
O.k... yesterday we left the canvas to dry.

Now we're going to pick it up by creating the little ephemera boxes we're going to affix to the canvas. To start off with you're going to need 9 pieces of ephemera. The size will be determined by your canvas. For this example I'm going to cut the pieces 2.5" x 2.5" square. For larger canvases you could cut larger pieces for larger boxes or you could still cut the 2.5" squares but add more to your canvas. It's totally up to you.

Score each of the squares 1/4 - 1/2" on each side. You're also going to score a diagonal line in each of the corners as shown below.

Crease and fold each of the sides - you're going to pinch the scored corners in towards the center. You don't need to add any glue - we're going to use them just as they are. Fold the other 8 squares of paper.

Now comes the fun part...you can add collage images, photos, bits of ephemera, stamped images, or anything you like to each of the squares. I was originally going to use photos and collage images but I changed my mind after I got going... I did use several vintage looking flower images (from Altered Pages)

But I also filled one of the boxes with mini buttons...

a few pieces of a foldable ruler and more!

Once you have all of the boxes filled, it's time to start affixing them to the canvas. You can see here (sort of) where I made an X in the center of the canvas using a highlighter. This is just to give me a starting point for gluing my first box down.

I started by gluing the center box down then gluing the rest of the boxes in. When you place them on the canvas you want to make sure that all of the edges are snug against the others. This will ensure that the walls of the boxes will stand up.

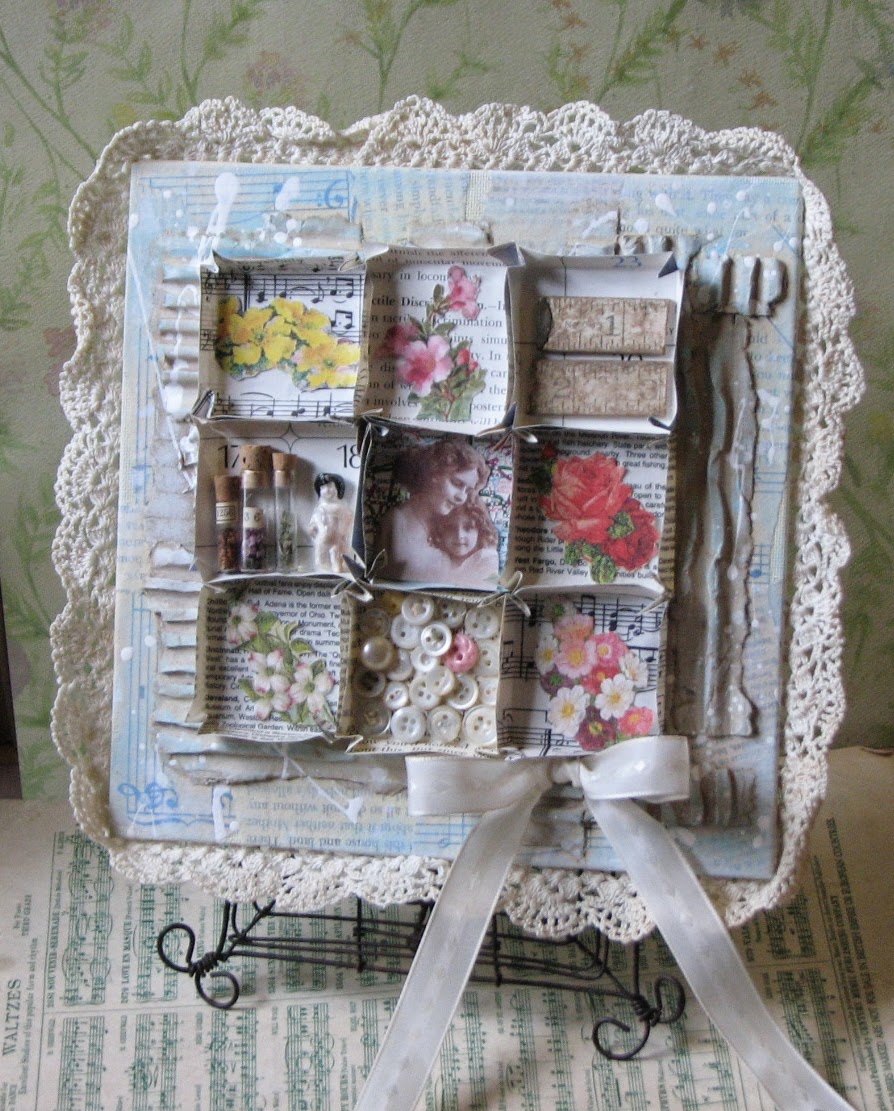
And here's what it looks like with all of the boxes glued down...

You can finish it off any way you like. I added some vintage crochet lace around the outside and added a bow. I kept it simple because I wanted the boxes to be the focal point...not a bunch of embellishments.


So there you go...
hope you like it and give it a try.
It's really lots of fun to fill the little boxes.
This is a great idea for gifts because you can use any little goodies in the box so they can be highly personalized for anyone!
I love it! Thanks for the tutorial!
ReplyDeleteawesome Roni...Thanks for sharing with all of us. =)
ReplyDeletethis is a great project!! thanks so much for sharing!
ReplyDelete